Appearance
Customizing the Polaris Checkout Page
The Polaris Checkout Page enables you to create a unique, branded payment experience for your customers with ease. Customization options include setting a logo, adjusting main colors, and defining styles completely using our CSS editor. Styles can be defined at the Merchant level and/or Channel level, allowing you to maintain a streamlined look and feel across your Channels while still being able to customize each one individually, if desired.
To access the customization page, go to “Merchant Configuration” and select one of your Merchants or Channels. At the top, you’ll find a “Customize Checkout” button that will take you directly to the customization options.
INFO
How inheritance works
Inheritance flows only downward from the Merchant to Channels. It does not work upward or across other Channels. Once a Channel makes any customization, it fully takes over control of that setting, and the Merchant cannot override it.
Customization Options
Logo
You can change the logo of your checkout page by providing a link to an image file.
Please ensure that your image meets the following requirements:
- Format: JPG or PNG
- Maximum File Size: 512 KB
- Minimum Resolution: 128 x 128 pixels
Main Color Adjustments or Custom CSS
- You can choose between simple main color adjustments (primary and secondary colors) or use custom CSS for more detailed styling of the checkout page.
- This choice, as well as the actual styles (Main Color Adjustment or custom CSS), can be configured differently at both the Merchant and Channel levels.
Main Color Adjustments
With Main Color Adjustments, you can select a primary color and a secondary color to customize the checkout page. The primary color applies to the body background, while the secondary color is used for the background of the selected payment method.
To ensure the colors are not too overwhelming, it is recommended to include an opacity value when defining the colors. Additionally, only colors that maintain sufficient contrast for readable text are allowed, ensuring compliance with accessibility standards.
Custom CSS
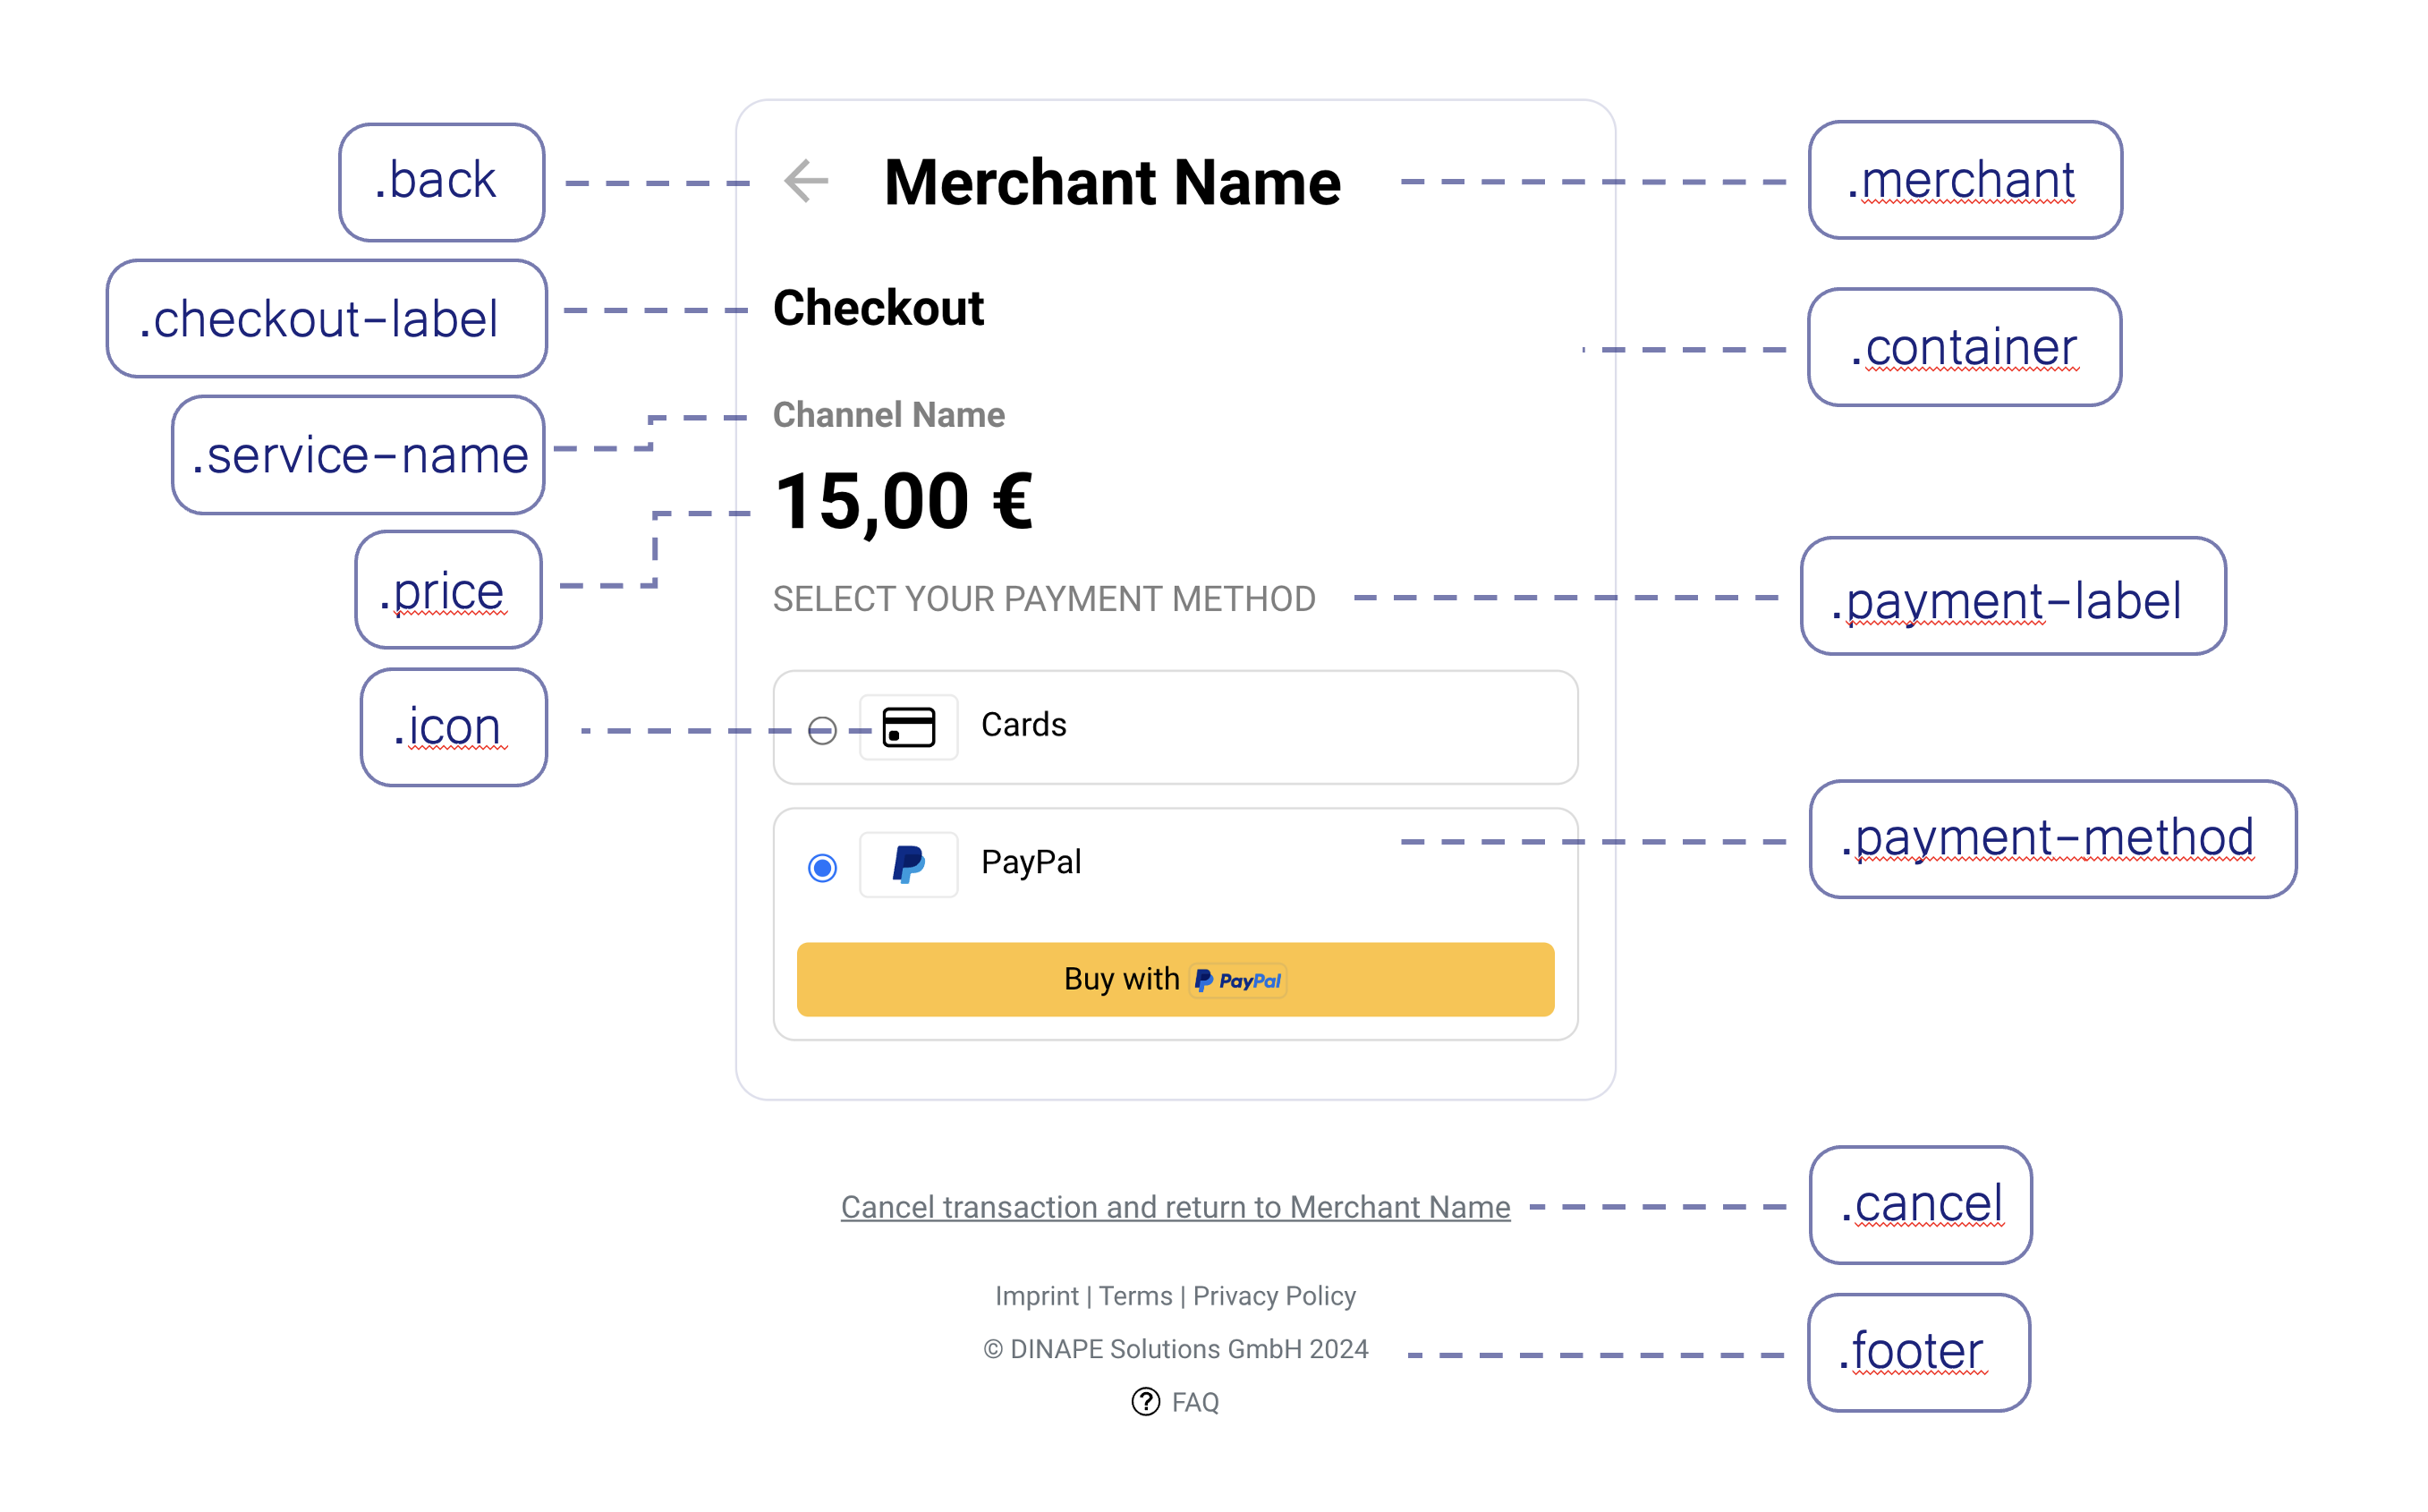
When switching from Main Color Adjustments to Custom CSS, you can either write your own CSS directly or upload a CSS file. Here you can see the most important classes you can change:
Please note that not every style is permitted. In addition to validating the correct syntax, prohibited styles are also checked. If any of these styles are detected, they cannot be saved. Below is a list of cases to check for if you receive an error message due to prohibited styles:
display: noneon important elements:- Classes:
merchant,price,payment-methods,payment-method,payment-label,payment-method,card-container,footer,footer-left,footer-center,footer-right - Elements:
label
- Classes:
font-colorandbackground-color:
Allow only specific combinations of text color and background color that are compliant (e.g., based on contrast calculators). The text must always have sufficient contrast with the background. The contrast is checked according to the WCAG contrast rule and must be at least 4.5:1 for regular text.font-sizeand spacing:- Minimum font size: 10px
- No negative values for
marginorpadding
Details
Changes will be reflected in real time on the right-hand side, showing how they will appear on the checkout page. Please note that this is only a preview; the changes will take effect in production only after you save the settings.
Logic and Hierarchy of Customization
Inheritance from Merchant to Channel
- The Channel inherits its configuration (Logo / CSS / Main Color Adjustment) from the Merchant by default.
- A Channel can override any of these inherited configurations, including:
- The choice between using Main Color Adjustments or Custom CSS.
- The chosen color or specific CSS itself.
- The logo.
- If no Main Color Adjustment or CSS is set, white is used as the default.
- If no logo is defined, the Checkout Page will display the Channel Name as text.
One-Way Overwrite
- Once a Channel has customized its settings, these changes are no longer controlled by the Merchant.
- There is no upward inheritance. Changes made at the Channel level do not affect the Merchant's settings or any other Channels.
- To reset a Channel's settings to those of its Merchant, you can use the "Reset to Merchant Settings" option.
Practical Example
At the Merchant Level:
- A default logo is uploaded, and a decision is made to use custom CSS for styling.
- The Merchant also applies CSS rules to define the checkout page's layout and appearance.
At the Channel Level:
- One Channel decides to use the predefined color settings instead of CSS. The logo is also updated for this specific Channel.
- Another Channel retains the Merchant's default settings but updates its logo to align with a branding strategy for a specific ad channel.
By utilizing these customization features, businesses can create a consistent and branded checkout experience while maintaining flexibility for specific needs at the Channel level.